


Whether you’re taking a yoga class or doing the postures at home, when you have rheumatoid arthritis you’ve probably experienced a moment when you realize you should not do a pose as instructed. Maybe it puts too much pressure on your hands, or twists your hip in a direction you suspect your troubled joint shouldn’t go.
Fortunately, you don’t have to sit the yoga class out.
Experts say there are simple adjustments people living with rheumatoid arthritis (RA) can make to keep yoga poses from overstressing your joints.
Assess the Yoga Teacher and Her Response to Your Health Condition
One of the most important aspects of a successful yoga class if you have RA is a good teacher, says Eddie Stern, a yoga teacher in New York City and the author of One Simple Thing: A New Look at the Science of Yoga and How It Can Transform Your Life.
Stern suggests pondering these questions when evaluating an instructor: Does the person articulate instructions well? Do you connect with the person? Does he or she carefully observe the class, and gear instruction to the level of the students there? Does he or she listen well?
And perhaps most importantly, “When you come into the class and tell them you have RA, do they say, ‘I’ll help you modify some of the poses’?”
Yoga Injuries Are Rare, but They Do Happen
Being careful with your poses, and modifying them as needed, can help you avoid injuries, which can happen with yoga as with any exercise program.
For example, a study published in July 2019 in BMC Complementary and Alternative Medicine surveyed 1,700 yoga practitioners in Germany and found some 10 percent reported injuring themselves during their practice. In the survey, people with chronic illnesses were more likely than others to be among the injured.
Still, yoga is safer than many other forms of exercise, the study observed. “Compared to other types of sports and exercises, the overall injury rate of yoga per 1,000 practice hours appears to be relatively low,” it concluded.
Stay in Class, but Make Modifications to Yoga Poses
If your instructor suggests poses you know won’t be good for your condition, feel free to pass. A handstand, for instance, is going to stress your wrist and finger joints no matter how you try to modify it, says Loren Fishman, MD, a rehabilitation physician in New York City and the author of numerous books and articles about yoga and health.
For other poses, though, little changes can make a big difference. Adapting the postures in ways that take the excess strain off your joints allows you to get the benefits and the enjoyment of participating without increasing the risk, Dr. Fishman says.
Try these five yoga modification strategies to reduce the likelihood that you'll endanger or hurt your joints.
1. Use Yoga Props to Take the Pressure off Your Joints
A great way to shift stress off your joints is to use yoga props. Those specifically made for yoga, such as foam blocks and cotton yoga straps, are good to have, as is a folded blanket and a simple chair.
Try Doing a Downward-Facing Dog With Some Extra Support
When doing the popular pose Downward-Facing Dog, for example, grab two blocks before beginning the posture, Fishman advises. This will help absorb some of the force off your fingers as you rise into the V-shaped position with your buttocks in the air and your body weight supported by your hands and feet.
To use the blocks, place your hands on two blocks that are flat on the floor with their short ends pressed against a wall. By facing the wall and holding onto the blocks with your hands as you press into the pose, you redistribute the weight toward the palms and away from your fingers.
Use Blocks to Make a Spinal Twist Easier on Hips and Knees
Similarly, you can use a block to modify a spinal twist to better protect your hips and knees.
- To do this supine twist, also known as revolved abdomen pose, lie on your mat on your back, keeping your back and shoulders on the floor, arms outstretched.
- Bend your knees and place a flat yoga block between them, then gently bring both legs to one side. Hold for a few breaths, then repeat on the other side.
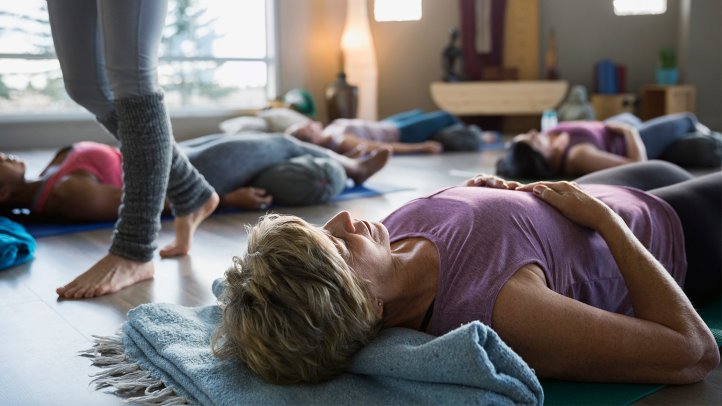
2. Switch to the Floor if Standing Puts Too Much Stress on Your Lower Body
Many classes feature a long segment of standing poses. But “all standing poses can be done lying on your mat on the floor” if your legs hurt when you stand too long, says Stern, who also teaches a Coursera class called Engineering Health: Introduction to Yoga and Physiology.
For example, Stern says, perhaps your class is doing a standing triangle pose, where you spread your legs wide, slide your right hand down the side of your leg, and raise the other arm up overhead, looking up at your hand. You can lie on your mat on your back and do the same movements supine.
3. Take Extra Care With Shoulder Stand Pose
One of the poses that cause the most injuries is shoulder stand, the German study found. Along with head- and handstands, these poses are involved in nearly 30 percent of all injuries reported.
Modifying the shoulder stand, therefore, is smart for everyone, but especially people with RA, because of the strain the pose places on your neck and wrists as you lift your back and legs straight into the air, supported by your hands.
The Santa Monica, California, yoga therapist Leslie Kazadi, who teaches and leads workshops locally as well as on the website YogisAnonymous, suggests releasing the pressure on your neck by placing a folded blanket or towel beneath your shoulders (it should not be under your neck and head) as you raise your legs.
There Are Several RA-Friendly Alternatives to Shoulder Stand
Another alternative is to do an even more modified shoulder stand: You don’t raise your legs as straight but still get the benefits of the inversion.
- Keep the blanket under your shoulders and place a yoga block within reach as you lie on your back.
- Instead of lifting your legs, bend your knees and keep your feet flat on the floor.
- Lift your hips and slide a block (on its largest side) under the sacrum.
- Keeping your weight on the block, raise your legs. You can stack a second block on top of the first if you want your hips to go higher. This can also be done with a yoga wheel if you have one.
4. Make the Poses More Dynamic — and More Joint Friendly
People with joint issues may find it easier to move in and out of poses rather than hold them static for a long period of time, Stern says.
For example, rather than move into Warrior Two (bending your front knee and thrusting one arm in front of you with the other behind) and holding it for several minutes, modify the pose slightly and make it more dynamic.
Don’t bring your front leg out as far as you might otherwise, and bend your front knee only for a few moments before straightening. Then lower and raise several times, inhaling and exhaling in rhythm as you do so. “This way you are strengthening your muscles and also moving fluids in the joint,” Stern says.
5. Modify Some Yoga Poses by Using a Chair
If you don’t want to go all the way down to the floor, you can use a chair as a modification for many poses.
When doing a spinal twist, for example, Fishman suggests using a sturdy chair that has armrests. Place both hands on one armrest as you stretch your spine up and turn to that side.
For an additional stretch, you can place the hand furthest from the chair arm you're twisting to on top of the back of the chair.


;void(0);)